संक्षिप्त सारांश: क्लॉड कोड को आधिकारिक क्लॉड कोड वेबसाइट से macOS, Windows, और Linux के लिए नेटिव इंस्टॉलर के माध्यम से इंस्टॉल किया जा सकता है। क्लॉड कोड चलाने से पहले विंडोज उपयोगकर्ताओं को WSL2 इंस्टॉल करना होगा। इंस्टॉलेशन के बाद, जब क्लॉड कोड पहली बार लॉन्च होने पर आपके ब्राउज़र विंडो को आपके क्लॉड खाते से प्रमाणित करने के लिए खोलेगा, तो आप सीधे अपने टर्मिनल या डेस्कटॉप ऐप से AI सहायता के साथ कोडिंग शुरू कर सकते हैं।
क्लॉड कोड, एजेंटिक AI डेवलपमेंट टूल में एंथ्रोपिक का कदम है। यह कमांड-लाइन असिस्टेंट कोडबेस को पढ़ता है, फ़ाइलों को संपादित करता है, कमांड चलाता है, और डेवलपमेंट वर्कफ़्लो के साथ एकीकृत होता है।
लेकिन इसे इंस्टॉल करना हमेशा सीधा नहीं होता है। विभिन्न प्लेटफार्मों के लिए विभिन्न दृष्टिकोणों की आवश्यकता होती है। विंडोज को अतिरिक्त सेटअप की आवश्यकता होती है। और दस्तावेज़, हालांकि व्यापक हैं, नए लोगों को अभिभूत कर सकते हैं।
यह गाइड जटिलता को दूर करती है। इसमें सिस्टम आवश्यकताएं, प्लेटफ़ॉर्म-विशिष्ट इंस्टॉलेशन चरण, प्रमाणीकरण और सत्यापन शामिल हैं - क्लॉड कोड को ठीक से चलाने के लिए आवश्यक सब कुछ।
इंस्टॉलेशन से पहले सिस्टम आवश्यकताएँ
आधिकारिक क्लॉड कोड दस्तावेज़ के अनुसार, टूल macOS, Windows, और Linux का समर्थन करता है। हालाँकि, प्रत्येक प्लेटफ़ॉर्म की अपनी विशिष्ट पूर्व-आवश्यकताएँ हैं।
macOS के लिए, आवश्यकताएँ न्यूनतम हैं। सिस्टम को macOS 13.0 या बाद के संस्करण की आवश्यकता है। Intel और Apple Silicon दोनों चिप्स ठीक काम करते हैं।
Windows में अधिक जटिलता है। ऑपरेटिंग सिस्टम Windows 10 बिल्ड 19041 या बाद का, या Windows 11 होना चाहिए। लेकिन यहाँ पकड़ है - क्लॉड कोड Windows पर नेटिव रूप से नहीं चलता है।
Windows Subsystem for Linux 2 (WSL2) अनिवार्य है। यह एक Linux वातावरण बनाता है जहां क्लॉड कोड वास्तव में संचालित होता है। WSL2 के बिना, इंस्टॉलेशन विफल हो जाता है।
Linux उपयोगकर्ताओं को 64-बिट वितरण की आवश्यकता है। आधिकारिक दस्तावेज़ Ubuntu, Debian, Fedora, और अन्य प्रमुख वितरणों के लिए समर्थन की पुष्टि करता है। Alpine Linux और musl-आधारित सिस्टम को अतिरिक्त कॉन्फ़िगरेशन की आवश्यकता होती है।
सभी प्लेटफार्मों को इंस्टॉलेशन के दौरान एक स्थिर इंटरनेट कनेक्शन की आवश्यकता होती है। डाउनलोड आकार भिन्न होते हैं लेकिन आमतौर पर 50MB से 500MB तक होते हैं, जो पहले से इंस्टॉल किए गए चीज़ों पर निर्भर करता है।
| प्लेटफ़ॉर्म | न्यूनतम संस्करण | विशेष आवश्यकताएँ |
|---|---|---|
| macOS | 13.0 | कोई नहीं |
| Windows | 10 बिल्ड 19041 या 11 | WSL2 आवश्यक |
| Linux | 64-बिट वितरण | glibc-आधारित को प्राथमिकता दी जाती है |
macOS पर क्लॉड कोड इंस्टॉल करना
macOS इंस्टॉलेशन प्रक्रिया एक नेटिव इंस्टॉलर का उपयोग करती है। यह सभी प्लेटफार्मों के बीच सबसे सरल मार्ग है।
सबसे पहले, आधिकारिक क्लॉड कोड वेबसाइट से इंस्टॉलर डाउनलोड करें। डाउनलोड पेज स्वचालित रूप से macOS का पता लगाता है और उपयुक्त पैकेज प्रदान करता है।
डाउनलोड की गई .dmg फ़ाइल खोलें। क्लॉड कोड एप्लिकेशन को Applications फ़ोल्डर में ड्रैग करें। मानक macOS इंस्टॉलेशन - यहाँ कुछ भी असामान्य नहीं है।
कुछ उपयोगकर्ताओं को पहली बार लॉन्च करते समय सुरक्षा प्रॉम्प्ट का सामना करना पड़ता है। macOS डिफ़ॉल्ट रूप से अज्ञात डेवलपर्स से ऐप्स को ब्लॉक करता है। क्लॉड कोड एप्लिकेशन पर राइट-क्लिक करें और इस एक-बार की चेतावनी को बायपास करने के लिए "Open" चुनें।
कमांड-लाइन टूल डेस्कटॉप एप्लिकेशन के साथ स्वचालित रूप से इंस्टॉल हो जाता है। टर्मिनल खोलें और सत्यापित करने के लिए `claude --version` टाइप करें। यदि संस्करण संख्या दिखाई देती है, तो इंस्टॉलेशन सफल रहा।
macOS इंस्टॉलेशन सत्यापित करना
सब कुछ काम कर रहा है यह पुष्टि करने के लिए इन कमांड को चलाएं:
| claude --version claude --help |
दोनों कमांड को बिना त्रुटियों के आउटपुट वापस करना चाहिए। संस्करण कमांड इंस्टॉल किए गए क्लॉड कोड संस्करण को दिखाता है। सहायता कमांड उपलब्ध विकल्पों और कमांड को प्रदर्शित करता है।
एक परीक्षण निर्देशिका बनाने से पूर्ण कार्यक्षमता को सत्यापित करने में मदद मिलती है। प्रोजेक्ट फ़ोल्डर में नेविगेट करें और इंटरैक्टिव सत्र शुरू करने के लिए `claude` चलाएँ। टूल को इनिशियलाइज़ होना चाहिए और यदि पहले से लॉग इन नहीं है तो प्रमाणीकरण के लिए संकेत देना चाहिए।
WSL2 के साथ विंडोज इंस्टॉलेशन
Windows इंस्टॉलेशन के लिए कई चरणों की आवश्यकता होती है। प्रक्रिया macOS से अधिक समय लेती है लेकिन प्रबंधनीय बनी रहती है।
WSL2 को पहले इंस्टॉल किया जाना चाहिए। व्यवस्थापक के रूप में PowerShell खोलें और चलाएं:
| wsl --install |
यह कमांड डिफ़ॉल्ट रूप से WSL2 और Ubuntu को इंस्टॉल करता है। सिस्टम को रीस्टार्ट की आवश्यकता होगी। रीबूट करने के बाद, प्रारंभिक सेटअप पूरा करने के लिए Ubuntu स्वचालित रूप से लॉन्च हो जाता है।
जब संकेत दिया जाए तो एक यूनिक्स उपयोगकर्ता नाम और पासवर्ड बनाएं। ये क्रेडेंशियल विंडोज लॉगिन क्रेडेंशियल से अलग हैं।
एक बार WSL2 चलने के बाद, Linux इंस्टॉलेशन प्रक्रिया लागू होती है। Ubuntu टर्मिनल (WSL2 के साथ इंस्टॉल किया गया) खोलें और Linux के लिए क्लॉड कोड इंस्टॉलर डाउनलोड करें।
WSL2 में क्लॉड कोड इंस्टॉल करना
आधिकारिक दस्तावेज़ के अनुसार, इंस्टॉलेशन कमांड नेटिव इंस्टॉलर को डाउनलोड और चलाता है:
| curl -o- raw.githubusercontent.com/nvm-sh/nvm/v0.39.7/install.sh | bash |
यह स्क्रिप्ट निर्भरताओं को स्वचालित रूप से संभालती है। यह आवश्यक होने पर Node.js इंस्टॉल करता है, क्लॉड कोड बाइनरी सेट करता है, और PATH चर को कॉन्फ़िगर करता है।
इंस्टॉलेशन में कुछ मिनट लगते हैं। प्रगति बार और स्थिति संदेश इंगित करते हैं कि क्या हो रहा है। जब पूरा हो जाए, तो पर्यावरण चर को रीफ़्रेश करने के लिए टर्मिनल को बंद करें और फिर से खोलें।
इंस्टॉलेशन का परीक्षण macOS के समान प्रक्रिया का पालन करता है। सत्यापित करने के लिए `claude --version` चलाएं।

Linux इंस्टॉलेशन प्रक्रिया
Linux उपयोगकर्ताओं के पास सबसे सीधी इंस्टॉलेशन पथ है। नेटिव इंस्टॉलर WSL2 जैसी अतिरिक्त परतों के बिना सीधे काम करता है।
इंस्टॉलेशन स्क्रिप्ट डाउनलोड करें और चलाएं:
| curl -fsSL claude.ai/install.sh | bash |
यह क्लॉड कोड बाइनरी डाउनलोड करता है, निर्भरताओं को इंस्टॉल करता है, और शेल पर्यावरण को कॉन्फ़िगर करता है। स्क्रिप्ट वितरण का पता लगाती है और तदनुसार समायोजित करती है।
Ubuntu और Debian-आधारित सिस्टम के लिए, स्क्रिप्ट इंस्टॉलेशन को कॉन्फ़िगर करती है। आधिकारिक दस्तावेज़ Ubuntu 20.04+, Debian 10+, और अन्य वितरणों के लिए समर्थन की पुष्टि करता है।
Alpine Linux विचार
Alpine Linux और musl-आधारित वितरणों को अतिरिक्त चरणों की आवश्यकता होती है। आधिकारिक दस्तावेज़ नोट करता है कि इन सिस्टमों को मैन्युअल कॉन्फ़िगरेशन की आवश्यकता होती है।
मानक इंस्टॉलर Alpine पर विफल हो सकता है। इसके बजाय, सीधे रिलीज़ पेज से musl-अनुकूल बाइनरी डाउनलोड करें। इसे सिस्टम PATH में एक निर्देशिका में निकालें, आमतौर पर `/usr/local/bin`।
निष्पादन योग्य अनुमतियाँ सेट करें:
| chmod +x /usr/local/bin/claude |
Alpine उपयोगकर्ताओं को आगे बढ़ने से पहले अनुकूलता सत्यापित करनी चाहिए। कुछ सुविधाएँ glibc-आधारित वितरणों की तरह समान रूप से काम नहीं कर सकती हैं।
प्रमाणीकरण और खाता सेटअप
क्लॉड कोड इंस्टॉल करने के बाद, अपने टर्मिनल में `claude` चलाएं। पहली बार लॉन्च होने पर, क्लॉड कोड आपको लॉग इन करने के लिए एक ब्राउज़र विंडो खोलता है।
यह क्लॉड प्रमाणीकरण पृष्ठ खोलता है। मौजूदा क्लॉड खाते से साइन इन करें या नया बनाएं।
ब्राउज़र एक प्राधिकरण कोड प्रदर्शित करता है। इस कोड को कॉपी करें और टर्मिनल पर वापस जाएं। जब संकेत दिया जाए तो कोड पेस्ट करें।
सफल प्रमाणीकरण क्रेडेंशियल को स्थानीय रूप से संग्रहीत करता है। भविष्य में लॉगिन की आवश्यकता नहीं होगी जब तक कि क्रेडेंशियल समाप्त न हो जाएं या मैन्युअल रूप से साफ़ न हो जाएं।
टीम और एंटरप्राइज़ प्रमाणीकरण
आधिकारिक प्रमाणीकरण दस्तावेज़ के अनुसार, क्लॉड फॉर टीम्स या एंटरप्राइज़ का उपयोग करने वाली टीमों के पास अतिरिक्त विकल्प होते हैं। संगठन सिंगल साइन-ऑन (SSO) या क्लाउड प्रदाता प्रमाणीकरण को कॉन्फ़िगर कर सकते हैं।
SSO सेटअप के लिए व्यवस्थापक कॉन्फ़िगरेशन की आवश्यकता होती है। व्यक्तिगत डेवलपर्स तब व्यक्तिगत क्लॉड खातों के बजाय अपने संगठन के पहचान प्रदाता के माध्यम से प्रमाणित होते हैं।
क्लाउड प्रदाता प्रमाणीकरण AWS, Google Cloud, और Azure परिनियोजन के लिए काम करता है। यह विधि अलग क्लॉड खातों के बजाय मौजूदा क्लाउड क्रेडेंशियल का उपयोग करती है।
| प्रमाणीकरण विधि | उपयोग का मामला | सेटअप जटिलता |
|---|---|---|
| व्यक्तिगत खाता | व्यक्तिगत डेवलपर | सरल |
| टीम/एंटरप्राइज SSO | संगठन | व्यवस्थापक की आवश्यकता है |
| क्लाउड प्रदाता | AWS/GCP/Azure उपयोगकर्ता | मध्यम |
डेस्कटॉप ऐप इंस्टॉलेशन
क्लॉड कोड कमांड-लाइन और डेस्कटॉप एप्लिकेशन दोनों प्रदान करता है। डेस्कटॉप ऐप पूर्ण टर्मिनल कार्यक्षमता को बनाए रखते हुए एक ग्राफिकल इंटरफ़ेस प्रदान करता है।
आधिकारिक क्लॉड वेबसाइट से डेस्कटॉप इंस्टॉलर डाउनलोड करें। पृष्ठ macOS, Windows, और Windows ARM64 संस्करण प्रदान करता है। सिस्टम के लिए उपयुक्त संस्करण का चयन करें।
macOS इंस्टॉलेशन पहले वर्णित .dmg प्रक्रिया का अनुसरण करता है। विंडोज उपयोगकर्ता WSL2 सेटअप की आवश्यकता के बिना ग्राफिकल इंटरफ़ेस के लिए डेस्कटॉप ऐप डाउनलोड कर सकते हैं।
डेस्कटॉप ऐप में एकीकृत टर्मिनल एक्सेस शामिल है। यह बाहरी टर्मिनल अनुप्रयोगों पर स्विच किए बिना क्लॉड कोड सत्र लॉन्च कर सकता है।
डेस्कटॉप ऐप का एक लाभ पृष्ठभूमि उपलब्धता है। आधिकारिक डाउनलोड पृष्ठ के अनुसार, ऐप 'बैकग्राउंड में तैयार रहता है' और किसी भी ऐप से विंडो स्विच किए बिना या फ़ोकस खोए बिना ऊपर लाया जा सकता है।

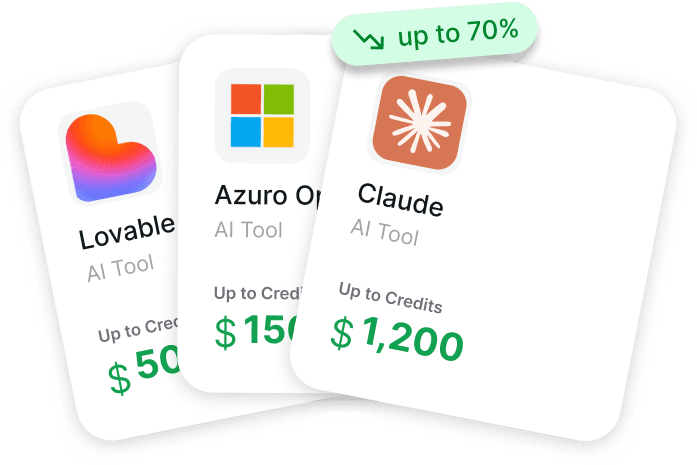
अपने क्लॉड कोड स्टैक के लिए क्रेडिट खोजने के लिए Get AI Perks का उपयोग करें
इंस्टॉलेशन आसान हिस्सा है। वास्तविक लागत आमतौर पर इसके आसपास की चीजों से आती है: इंफ्रास्ट्रक्चर, सपोर्टिंग टूल्स, और सेटअप और परीक्षण के दौरान उपयोग की जाने वाली भुगतान की गई सेवाएं। Get AI Perks स्टार्टअप क्रेडिट और छूट को एक ही स्थान पर सूचीबद्ध करके मदद कर सकता है, साथ ही उन्हें कैसे लागू किया जाए, इस पर मार्गदर्शन भी प्रदान कर सकता है।
Get AI Perks के साथ, आप कर सकते हैं:
- क्लाउड और AI-संबंधित टूल के लिए क्रेडिट खोजें
- लागू करने से पहले पर्क्स की शर्तों की जांच करें
- उन ऑफ़र पर समय बर्बाद करने से बचें जिनके लिए आप योग्य नहीं हो सकते हैं
- अपना सेटअप तैयार करने की लागत कम करें
यह देखने के लिए Get AI Perks पर जाएं कि क्या उपलब्ध ऑफ़र क्लॉड कोड के साथ उपयोग करने की योजना बना रहे टूल से मेल खाते हैं।
IDE एक्सटेंशन और इंटीग्रेशन
स्टैंडअलोन इंस्टॉलेशन से परे, क्लॉड कोड लोकप्रिय डेवलपमेंट वातावरण के साथ एकीकृत होता है। Visual Studio Code और JetBrains IDEs के लिए एक्सटेंशन मौजूद हैं।
VS Code एक्सटेंशन मार्केटप्लेस के माध्यम से इंस्टॉल होता है। एक्सटेंशन पैनल में "Claude Code" खोजें और "Install" पर क्लिक करें। एक्सटेंशन को पहले कमांड-लाइन टूल इंस्टॉल करने की आवश्यकता होती है।
कुछ उपयोगकर्ता बंडल किए गए VS Code एक्सटेंशन फ़ाइल के साथ समस्याओं की रिपोर्ट करते हैं। यदि स्वचालित इंस्टॉलेशन "End of central directory record signature not found" त्रुटि के साथ विफल हो जाता है, तो बंडल की गई .vsix फ़ाइल दूषित हो सकती है।
वर्कअराउंड में CLI के बंडल संस्करण पर निर्भर रहने के बजाय VS Code मार्केटप्लेस से एक्सटेंशन को मैन्युअल रूप से इंस्टॉल करना शामिल है। यह दोनों घटकों को अलग करता है और इंस्टॉलेशन टकराव को रोकता है।
JetBrains इंटीग्रेशन समान रूप से काम करता है। IntelliJ IDEA, PyCharm, WebStorm, या अन्य JetBrains उत्पादों के भीतर JetBrains मार्केटप्लेस से प्लगइन इंस्टॉल करें।
इंस्टॉलेशन सफलता को सत्यापित करना
वास्तविक डेवलपमेंट कार्यों को शुरू करने से पहले उचित सत्यापन सुनिश्चित करता है कि क्लॉड कोड ठीक से काम करता है।
बुनियादी सत्यापन कमांड उपलब्धता की जांच करता है:
| claude --help claude --version |
इन कमांड को बिना त्रुटियों के निष्पादित होना चाहिए। सहायता कमांड उपलब्ध विकल्पों को सूचीबद्ध करता है। संस्करण कमांड इंस्टॉल किए गए रिलीज़ को दिखाता है।
कार्यात्मक परीक्षण के लिए सत्र शुरू करने की आवश्यकता होती है। एक परीक्षण निर्देशिका बनाएं:
| mkdir test-project cd test-project claude |
यह एक इंटरैक्टिव क्लॉड कोड सत्र को इनिशियलाइज़ करता है। टूल को निर्देशिका (इस मामले में खाली) का विश्लेषण करना चाहिए और एक प्रॉम्प्ट प्रस्तुत करना चाहिए।
सत्र के भीतर बुनियादी कमांड का प्रयास करें। उपलब्ध क्रियाओं को देखने के लिए `help` टाइप करें। सरल कार्य जैसे "create a README file" या "explain what you can do." का अनुरोध करें।
सफल प्रतिक्रियाएँ उचित इंस्टॉलेशन का संकेत देती हैं। यदि त्रुटियाँ होती हैं, तो वे आमतौर पर प्रमाणीकरण, नेटवर्क कनेक्टिविटी, या लापता निर्भरताओं से संबंधित होती हैं।

अपडेट और संस्करण प्रबंधन
क्लॉड कोड डिफ़ॉल्ट रूप से स्वचालित रूप से अपडेट होता है। आधिकारिक दस्तावेज़ बताता है कि टूल नए संस्करणों की जांच करता है और उन्हें उपयोगकर्ता के हस्तक्षेप के बिना इंस्टॉल करता है।
क्लॉड कोड सेटिंग्स के माध्यम से अपडेट व्यवहार को कॉन्फ़िगर किया जा सकता है। आधिकारिक दस्तावेज़ रिलीज़ चैनल कॉन्फ़िगरेशन और मैन्युअल अपडेट विकल्पों को कवर करता है।
मैन्युअल अपडेट के लिए इंस्टॉलेशन स्क्रिप्ट को फिर से चलाने की आवश्यकता होती है। प्रारंभिक इंस्टॉलेशन के लिए उपयोग किया जाने वाला समान कमांड नवीनतम संस्करण को खींचता है:
| curl -fsSL claude.ai/install.sh | bash |
परीक्षण या अनुकूलता कारणों से विशिष्ट संस्करणों को इंस्टॉल करना संभव है। उन्नत सेटअप दस्तावेज़ संस्करण पिनिंग और रिलीज़ चैनल कॉन्फ़िगरेशन को कवर करता है।
रिलीज़ चैनलों में स्टेबल, बीटा और नाइटली शामिल हैं। प्रोडक्शन वर्क के लिए स्टेबल की सिफारिश की जाती है। बीटा और नाइटली चैनल नई सुविधाओं तक शीघ्र पहुंच प्रदान करते हैं लेकिन उनमें बग हो सकते हैं।
सामान्य इंस्टॉलेशन समस्याएँ
क्लॉड कोड इंस्टॉलेशन के बारे में सामुदायिक चर्चाओं में कई मुद्दे अक्सर दिखाई देते हैं।
PATH कॉन्फ़िगरेशन से कई समस्याएँ उत्पन्न होती हैं। यदि इंस्टॉलेशन के बाद `claude` कमांड नहीं मिलता है, तो बाइनरी डायरेक्टरी सिस्टम PATH में नहीं है।
macOS और Linux पर, PATH में डायरेक्टरी जोड़ना आमतौर पर `~/.bashrc`, `~/.zshrc`, या समान शेल कॉन्फ़िगरेशन फ़ाइलों को संपादित करने में शामिल होता है। इंस्टॉलेशन स्क्रिप्ट आमतौर पर इसे स्वचालित रूप से संभालती है, लेकिन मैन्युअल सत्यापन समस्या निवारण में मदद करता है।
WSL2 में विंडोज उपयोगकर्ताओं को इंस्टॉलेशन के बाद टर्मिनल को बंद करने और फिर से खोलने की आवश्यकता हो सकती है। पर्यावरण चर मौजूदा सत्रों में रीफ़्रेश नहीं होते हैं।
नेटवर्क प्रतिबंध कुछ इंस्टॉलेशन को ब्लॉक करते हैं। कॉर्पोरेट फ़ायरवॉल या प्रॉक्सी सर्वर इंस्टॉलर डाउनलोड करने या प्रमाणीकरण सर्वर से कनेक्ट होने से रोक सकते हैं।
प्रॉक्सी कॉन्फ़िगरेशन के लिए पर्यावरण चर की आवश्यकता होती है:
| export HTTP_PROXY= proxy.example.com:8080 export HTTPS_PROXY= proxy.example.com:8080 |
अनुमति त्रुटियाँ संरक्षित निर्देशिकाओं में इंस्टॉल करते समय होती हैं। इंस्टॉलर को `/usr/local/bin` या समकक्ष स्थानों पर लिखने की पहुँच की आवश्यकता होती है। `sudo` के साथ चलाना इसे हल करता है लेकिन जब तक आवश्यक न हो तब तक इससे बचा जाना चाहिए।
अक्सर पूछे जाने वाले प्रश्न
क्या क्लॉड कोड इंटरनेट कनेक्शन के बिना चल सकता है?
नहीं। क्लॉड कोड को काम करने के लिए इंटरनेट कनेक्टिविटी की आवश्यकता होती है। टूल प्रसंस्करण के लिए एंथ्रोपिक के सर्वर पर कोड और क्वेरी भेजता है। स्थानीय कैशिंग कुछ ऑपरेशनों को अस्थायी रूप से ऑफलाइन काम करने की अनुमति दे सकती है, लेकिन पूर्ण कार्यक्षमता के लिए सक्रिय कनेक्शन की आवश्यकता होती है।
क्या क्लॉड कोड मौजूदा AI कोडिंग टूल के साथ काम करता है?
हाँ। क्लॉड कोड GitHub Copilot, Cursor, या अन्य AI डेवलपमेंट टूल के साथ चल सकता है। वे स्वतंत्र रूप से संचालित होते हैं और संघर्ष नहीं करते हैं। हालाँकि, एक साथ कई AI सहायकों का उपयोग करने से भ्रम पैदा हो सकता है कि कौन सा टूल किस कार्य को संभाल रहा है।
क्या विंडोज की सभी सुविधाओं के लिए WSL2 आवश्यक है?
कमांड-लाइन टूल के लिए विंडोज पर WSL2 की आवश्यकता होती है। हालाँकि, डेस्कटॉप एप्लिकेशन WSL2 की आवश्यकता के बिना Windows पर नेटिव रूप से चलता है। डेस्कटॉप ऐप शुद्ध कमांड-लाइन इंटरैक्शन के बजाय एक ग्राफिकल इंटरफ़ेस के माध्यम से समान कार्यक्षमता प्रदान करता है।
क्लॉड कोड का उपयोग करने में कितना खर्च आता है?
उपयोग और सदस्यता स्तर के आधार पर मूल्य भिन्न होता है। वर्तमान मूल्य निर्धारण के लिए आधिकारिक क्लॉड वेबसाइट देखें, क्योंकि लागत और योजना संरचनाएं समय के साथ बदलती रहती हैं। कुछ सुविधाओं के लिए क्लॉड प्रो या एंटरप्राइज़ सब्सक्रिप्शन की आवश्यकता होती है।
क्या क्लॉड कोड प्रोजेक्ट डायरेक्टरी के बाहर की फ़ाइलों को संपादित कर सकता है?
डिफ़ॉल्ट रूप से, क्लॉड कोड सुरक्षा के लिए फ़ाइल एक्सेस को वर्तमान प्रोजेक्ट डायरेक्टरी तक सीमित करता है। कॉन्फ़िगरेशन सेटिंग्स अनुमतियों का विस्तार कर सकती हैं, लेकिन ऐसा करने के लिए स्पष्ट प्राधिकरण की आवश्यकता होती है। सैंडबॉक्सिंग दस्तावेज़ विस्तार से अनुमति प्रबंधन को कवर करता है।
क्लॉड कोड और क्लॉड API में क्या अंतर है?
क्लॉड कोड इंटरैक्टिव कोडिंग सहायता के लिए एक डेवलपमेंट टूल है। क्लॉड API क्लॉड की AI क्षमताओं का उपयोग करने वाले एप्लिकेशन बनाने के लिए प्रोग्रामेटिक पहुंच प्रदान करता है। वे विभिन्न उद्देश्यों की पूर्ति करते हैं - एक डेवलपर्स के लिए कोड लिखने के लिए, दूसरा AI सुविधाओं को एकीकृत करने वाले अनुप्रयोगों के लिए।
क्या अनइंस्टॉल करने से क्लॉड कोड का सारा डेटा हट जाता है?
अनइंस्टॉल करने से एप्लिकेशन बाइनरी हट जाती है लेकिन कॉन्फ़िगरेशन फ़ाइलें और कैशेड डेटा रह सकता है। पूर्ण निष्कासन के लिए macOS और Linux पर `~/.claude` डायरेक्टरी, या Windows पर समकक्ष AppData स्थान को मैन्युअल रूप से हटाना आवश्यक है।
इंस्टॉलेशन के बाद शुरुआत करना
क्लॉड कोड इंस्टॉल और सत्यापित होने के साथ, अगला कदम यह समझना है कि इसका प्रभावी ढंग से उपयोग कैसे करें।
क्विकस्टार्ट दस्तावेज़ सरल कार्यों से शुरू करने की सलाह देता है। एक मौजूदा प्रोजेक्ट में नेविगेट करें और इंटरैक्टिव सत्र शुरू करने के लिए `claude` चलाएं।
क्लॉड से प्रोजेक्ट संरचना को समझाने के लिए कहें। यह सारांशित करने का अनुरोध करें कि कोडबेस क्या करता है। ये खोजपूर्ण क्वेरी टूल द्वारा कोड की व्याख्या कैसे की जाती है, यह समझने में मदद करती हैं।
छोटे बदलाव करने का प्रयास करें। क्लॉड से फ़ंक्शन में टिप्पणियाँ जोड़ने, सरल परीक्षण फ़ाइलें बनाने, या मूल कोड ब्लॉक को रीफ़ैक्टर करने के लिए कहें। ये कार्य जोखिम के बिना संपादन क्षमताओं का प्रदर्शन करते हैं।
यदि प्रोजेक्ट संस्करण नियंत्रण का उपयोग करता है तो Git एकीकरण स्वचालित रूप से काम करता है। क्लॉड कोड कमिट बना सकता है, अंतर बता सकता है, और परिवर्तनों के आधार पर सुधार का सुझाव दे सकता है।
आधिकारिक दस्तावेज़ में सामान्य डेवलपमेंट कार्यों के लिए वर्कफ़्लो उदाहरण शामिल हैं। इनमें बग फिक्सिंग, फीचर कार्यान्वयन, कोड समीक्षा और स्वचालित परीक्षण शामिल हैं।
क्लॉड कोड एक विकसित होता हुआ टूल है। इंस्टॉलेशन केवल नींव है। इसकी क्षमताओं, सीमाओं और सर्वोत्तम प्रथाओं को समझने के लिए प्रयोग और अभ्यास की आवश्यकता होती है।
क्लॉड कोड इंस्टॉल करने के लिए तैयार हैं? आधिकारिक वेबसाइट से अपने प्लेटफ़ॉर्म के लिए उपयुक्त इंस्टॉलर डाउनलोड करें और इस गाइड में उल्लिखित चरणों का पालन करें। अपने क्लॉड खाते से प्रमाणित करें, इंस्टॉलेशन को सही ढंग से काम करने के लिए सत्यापित करें, और AI-सहायता प्राप्त डेवलपमेंट का पता लगाना शुरू करें।